Build overview: why the panel gets so high
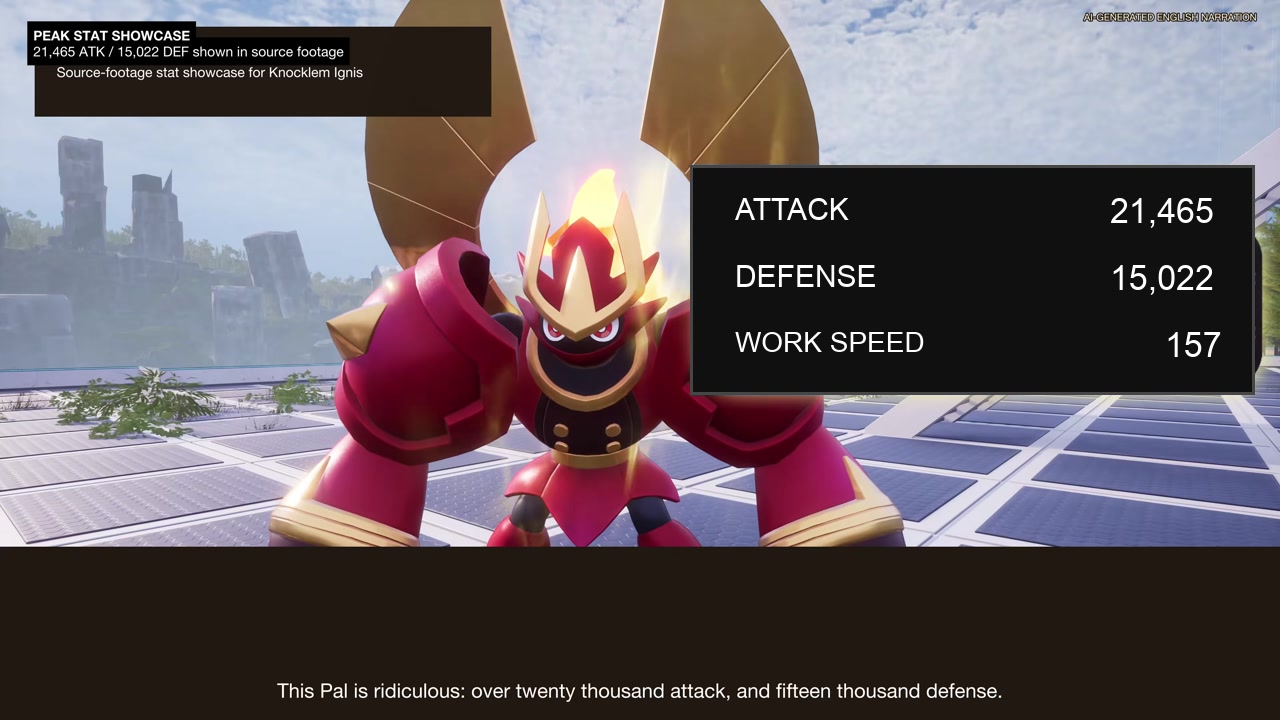
The opening panel is the result of stacked buffs, not a normal unbuffed Pal stat screen. The footage shows Knocklem Ignis at 21,465 attack and 15,022 defense after combining party support, partner-skill effects, accessories, consumables, and passives.
For an English-speaking viewer, the important lesson is the formula. If you copy only the Pal species without copying the buff layers, the result will not match the source-footage panel.
| Layer | What the footage uses | Why it matters |
|---|---|---|
| Base Pal | Knocklem Ignis | Provides the combat body and Iron Guardian Mode boost |
| Support Pals | Rooby, Finsider Ignis, Celesdir Noct, and Orserk | Adds fire damage, weakness damage, raw attack, and stack-based multipliers |
| Accessories | Charms, Batons, Marshal Badge, and Fortress Badge | Adds player and Pal attack/defense bonuses |
| Consumables | Mammorest Curry, Potato Chawanmushi, and High-Grade Enhancement Gun | Adds temporary attack, defense, and core-stat boosts |
| Passives | Burst or tank route | Determines whether the finished build favors damage or survival |
1. Start with support Pals, not the main Pal
The video first explains the support stack because that is where much of the final panel comes from. Rooby supports fire damage, Finsider Ignis supports fire weakness damage, and Celesdir Noct adds a large raw-attack layer while draining HP over time.
This means the build is element-sensitive. If you move the formula to a different element, replace the fire support pieces with matching support Pals instead of copying the list blindly.
- Use Rooby when the demonstrated fire-damage setup is the goal.
- Use Finsider Ignis for the fire weakness-damage layer shown in the footage.
- Use Celesdir Noct for raw attack, but account for the HP drain.
- Do not judge Knocklem Ignis alone before the support stack is active.
2. Maintain the Orserk multiplier
The footage then adds Orserk as the major stack-based multiplier. It describes the stack as building through bullet hits and shows the full stack reaching 30.
The source narration also says the translated description is misleading and that additional hit sources can help maintain the stack. Treat that interaction as patch-sensitive: verify it before building a permanent team around it.
- Use Orserk as the multiplier layer after the basic support Pals are set.
- Confirm that your current build can maintain stacks before testing final damage.
- If the stack falls off, the stat panel and real combat output will drop sharply.
3. Add Knocklem Ignis Iron Guardian Mode
After the support stack, activate Knocklem Ignis' partner skill, Iron Guardian Mode. In the footage, this adds a major attack and defense boost on top of the already stacked support effects.
This is why the order matters: the Pal's own partner skill is one layer in a larger formula, not the entire build by itself.
4. Match accessories to the element and role
The accessory layer uses Charms, Batons, and two Core Badges. The video keeps Marshal Badge for player and Pal attack and Fortress Badge for player and Pal defense.
For the flexible slots, change the Charm and Baton based on the element you are actually using. The demonstrated setup is fire-focused, so a different element should not keep fire-specific assumptions.
| Slot | Video role | Practical note |
|---|---|---|
| Marshal Badge | Player and Pal attack | Keep for the high-attack version |
| Fortress Badge | Player and Pal defense | Keep for the high-defense layer |
| Charm | Element or stat support | Swap to match the active element |
| Baton | Element or stat support | Swap to match the active element |
5. Add consumables and enhancement-gun upgrades
The footage lists Mammorest Curry for attack, Potato Chawanmushi for defense, and the High-Grade Enhancement Gun for core-stat increases. These buffs explain why a normal stat screen may look much lower without preparation.
Record whether your test uses food, enhancement-gun upgrades, world settings, and the same party support. Otherwise two players can compare panels that were built under different conditions.
6. Choose the passive route
The video ends by separating a burst route from a tank route. The burst setup is for Raid Bosses or most hard field bosses, while the tank route is for situations where surviving longer matters more than the highest possible burst.
| Route | Passive set from the video | Best use |
|---|---|---|
| Burst | Serenity, Eternal Flame, Demon God, and Diamond Body | Raid bosses and most hard field bosses when damage matters most |
| Tank | Immortal, Remarkable Physique, Demon God, and Serenity | One-on-one extreme boss attempts or fights where survival is the bottleneck |
7. What to verify before copying the build
Before you spend rare resources, reproduce the stack in a controlled test: same Pal, same passives, same support team, same food, same accessories, same enhancement state, and same game build.
If you use this on another favorite Pal, keep the structure but replace the element-specific pieces. The formula is more useful than a single exact roster.
- Check the game build shown by your client before testing.
- Test the stat panel before and after every support layer.
- Confirm Orserk stacks are actually staying active.
- Document food buffs and accessory swaps.
- Retest after hotfixes that mention Pals, partner skills, accessories, food, or combat balance.